3. Installing and Configuring PerformancePoint Services 2010
PerformancePoint
Services 2010 is installed with SharePoint 2010, but the
PerformancePoint Service Application is not created automatically. The
PerformancePoint Service Application will also create a service
application proxy. This proxy facilitates Web service calls between the
Web front-end server and the application server using the Windows
Communication Framework.
3.1. Creating a PerformancePoint Service Application
It is possible to create a
new PerformancePoint Service Application using the SharePoint Central
Administration website. The following procedure shows how to do this.
Open a browser and go to the SharePoint 2010 Central Administration website.
In the Application Management section, select Manage Service Applications.
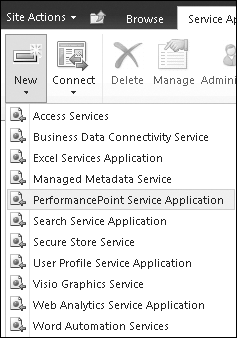
From the New menu, select PerformancePoint Service Application, as you can see in Figure 2.
A page opens where you can specify settings for the PerformancePoint Service Application, as shown in Figure 3.
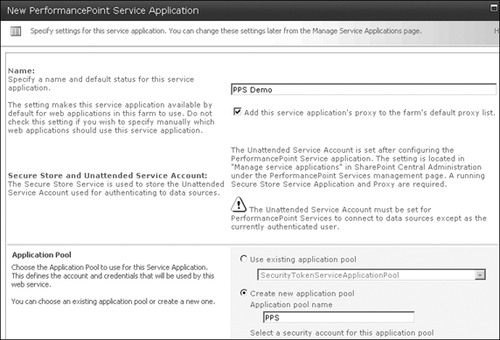
Specify
a name for the PerformancePoint Service Application. For
PerformancePoint Service Applications, this name must be unique. The
PerformancePoint Service Application will also have a service
application’s identity—a GUID—to distinguish the service application
from other service applications.
Select
the Add This Service Application’s Proxy To The Farm’s Default Proxy
List check box. With this setting, you specify that the service
application instance is added to the farm’s list of default service
applications.
You can use an existing application pool or to create a new application pool; creating
a new application pool that runs under a domain account is recommended.
Making use of the predefined option imposes a security risk because
these accounts have too many privileges.
The next page shows a summary of the additional configuration steps, as you can see in Figure 4. The additional steps are
Define An Unattended Service Account
Enable The Performancepoint Web Application And Site Collection Features
Configure trusted locations

3.2. Creating a Secure Store Service
The next step is to
create an unattended service account to connect to data sources. To do
this, you first must create a secure store service. The unattended
service account cannot use the application pool identity to connect to
data sources. The unattended account must be a domain account, and the
password of this account is stored in the secure store. The following
procedure shows how to create a new secure store service.
Launch the SharePoint 2010 Central Administration website.
In the Application Management section, select Manage Service Applications.
From the New menu, select Secure Store Service, as shown in Figure 5.

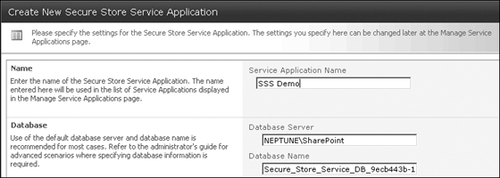
Specify a name for the Secure Store Service Application in the Service Application Name text box, as shown in Figure 6.
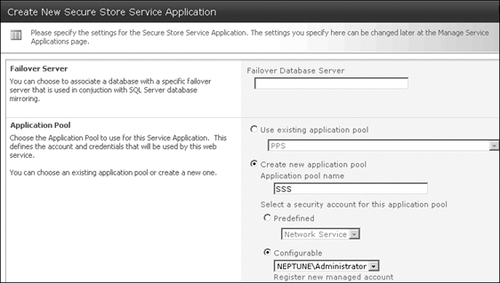
Specify a name for a new application pool, as shown in Figure 7, and click OK. The secure store service will be added automatically to the default proxy group.
At this point, the PerformancePoint Service and the secure store service are created and started.
Launch the SharePoint 2010 Central Administration website.
In the System Settings section, select Manage Services On Server. This page should look like Figure 8.

3.3. Defining an Unattended Service Account
There is a
difference between a service application and a service application
instance. If you want to use a different set of settings, you have to
make another service application. The next thing to do is to define an
unattended service account, and the following procedure shows how to do
this.
Launch the SharePoint 2010 Central Administration website.
In the Application Management section, select Manage Service Applications.
Click
the Secure Store Service link, or alternatively, select the secure
store service you created and click Manage in the Operations group. Both
options allow you to manage the properties of this secure store
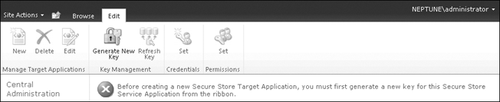
service. You will see an error (shown in Figure 9) indicating that there is no Secure Store Application key.
Select Generate New Key in the Key Management group.
Specify a pass phrase and confirm it, as shown in Figure 10.
This pass phrase is the only way to get the encrypted data. Make sure
to save the pass phrase, because if you want to refresh the key, you
will need to have it.

This pass phrase must contain at least 8 characters; these characters must include at least three of the following four groups:
Uppercase characters A through Z
Lowercase characters a through z
Numerals 0 through 9
Nonalphabetic characters such as !, $, /, ?, %
When you have finished specifying a pass phrase, click OK.
The error message will be replaced by a new message, shown here.
There are no Secure Store Target Applications in this Secure Store Service
Application. You can create a new Target Application from the Manage Target
Applications group in the Edit ribbon group.
3.4. Adding a PerformancePoint Service Application
The next step is to add the
PerformancePoint Service Application to the Secure Store Service
Application. The following procedure shows how to do this.
Launch the SharePoint 2010 Central Administration website.
In the Application Management section, select Manage Service Applications.
Select
the PerformancePoint Service link, or alternatively, select the
PerformancePoint Service you created and click Manage in the Operations
group. Both options allow you to manage the properties of this
PerformancePoint Service.
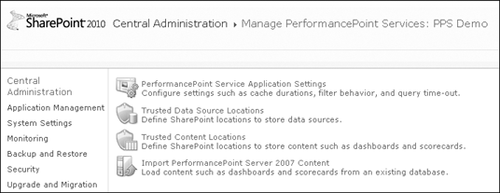
Click PerformancePoint Service Application Settings, as shown in Figure 11.
The next page shows that the name of the Secure Store Service
Application has been detected. This page contains all the configuration
settings for the PerformancePoint Service Application. In
PerformancePoint 2007, this configuration information was stored in the
Web.config file.
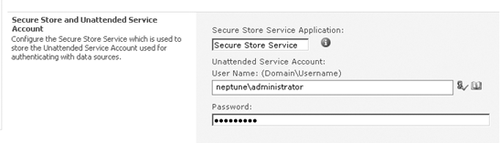
Specify the user name you want to use for the unattended service account for authenticating with data sources, as shown in Figure 12.
The credentials will be added to the target application. Make sure you
use an account with the least privileges possible. Best practice is to
avoid using an existing user account and to create a new account
specifically for the PerformancePoint Service Application.
3.5. Defining SharePoint Locations as Trusted Data Source Locations
The next procedure shows how to define SharePoint locations as trusted data source locations.
Click Trusted Data Source Locations as shown in Figure 11
previously. You can choose to trust the data source in all SharePoint
locations or only in specific locations. If you choose the latter and
click Apply, a new link becomes available: Add Trusted Data Source
Location. If you click this link, an Edit Trusted Data Source Location
page opens, as shown in Figure 13.
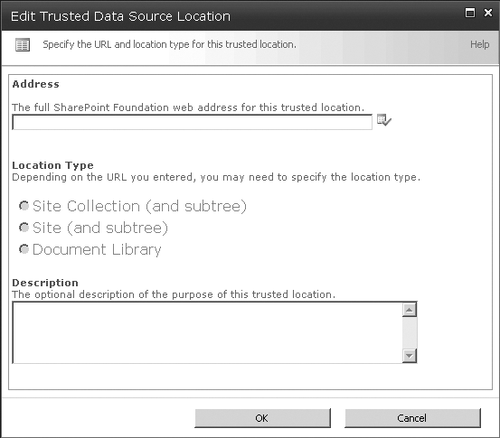
On
this page, you can specify the location type. The options available are
a SharePoint site collection (and subtree), a SharePoint site (and
subtree), or a library to store data sources. If you are finished, click
OK.
Now you have added a Trusted Data Source location.
3.6. Defining SharePoint Locations as Trusted Content Locations
The next procedure shows you how to define SharePoint locations as trusted content locations.
Click Trusted Content Locations as shown in Figure 11
previously. You can choose to trust content such as dashboards and
scorecards in all SharePoint locations or only in specific locations.
If
you choose to trust only specific locations and click Apply, a new link
becomes available: Add Trusted Content Location. Click this link to
open the Edit Trusted Content Location page. This page looks the same as
the Edit Trusted Data Source Location page you saw previously in Figure 13.
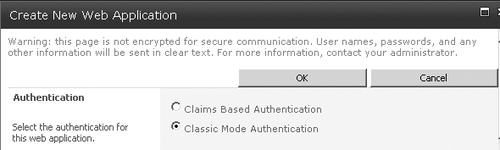
Note:
If you create a new Web application and you want to make use of PerformancePoint Services, make sure you choose Classic Mode Authentication (shown in Figure 14); otherwise, PerformancePoint Services will not work.
After configuring the
PerformancePoint Service Application, you can go to your SharePoint site
and open the Dashboard Designer. There is nothing new here; the
Dashboard Designer in SharePoint 2010 is the same one that was used in
SharePoint Server 2007.